
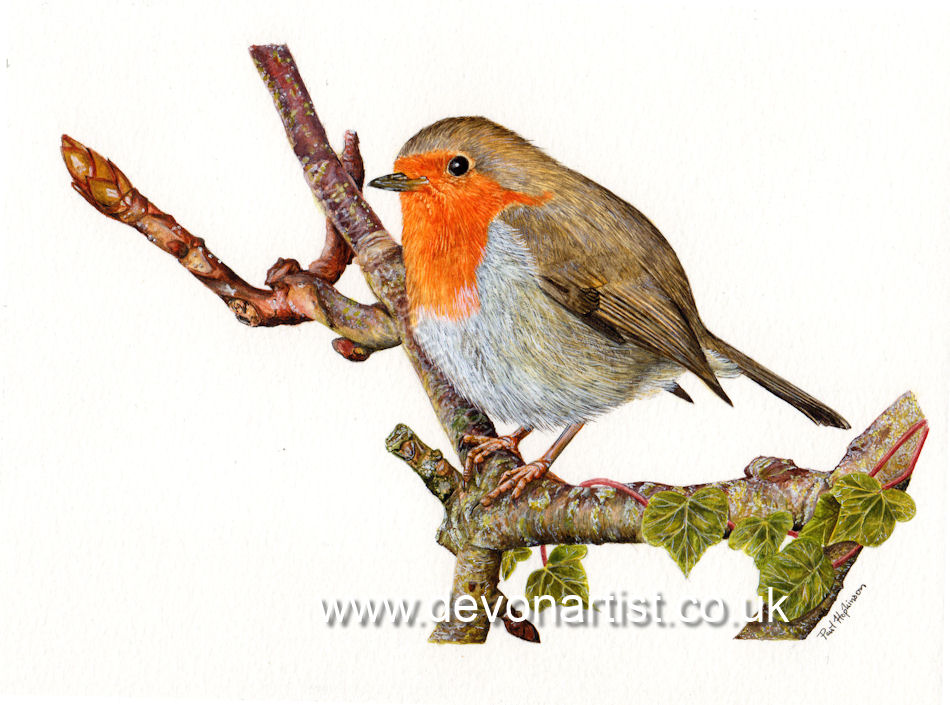
How to Paint a Robin in Detailed Watercolour

A little start to finish on how to paint a robin in detailed watercolour. To begin with, I needed a photo to work from. This was a project from a few years back when I had time to take some of my own reference photos. We were at Devon Wildlife Trust’s Halsdon Nature Reserve. There is a super bird hide there, nestled beside the River Torridge. Indeed, we were hoping to spot kingfisher and otter on the river. This little robin happened to land right in front of us on the branch of an over hanging horse chestnut tree. A few snapshots later and I had a photo that I was pleased enough with to use for a painting.
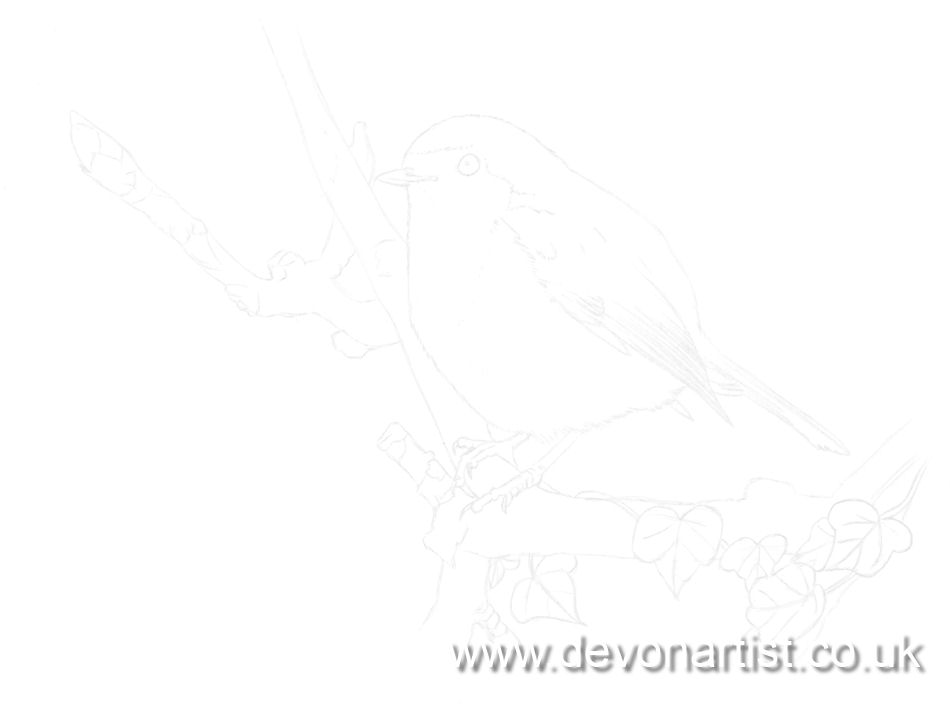
The Outline Drawing
The first stage of any painting is to get the reference photo down on the paper surface as an outline drawing. I pick out the main sections of the picture. For instance, the wing edge, the line above the eye a few individual feathers etc. You may notice I made a few changes to the twig the bird was standing on. I decided to add a bit of interest with a little twine of ivy wrapped around it. There are many ways of transferring your drawing to the watercolour paper. As I’ve covered this in another blog post, I won’t go into it here. Choose a method which works for you, and away you go.

Painting the Eye
You know me well enough by now and will not be surprised that I started with the robin’s eye. I carefully painted around the highlight. However, you could apply a little touch of masking fluid to preserve the white of the paper. With any bird or animal subject, it is really important to get the shine in the eye right. This gives the subject that much-needed life and is the essence of creating a realistic piece. Again, go with what works for you. If a little dab of white acrylic or gouache is your preferred way, that is fine.
Having completed the eye, I move on to the foundation washes for the bird itself. I start with the lightest colour that I can see within the feathers and apply this as a wet in wet wash. At the same time, I vary the depth of colour by applying more paint to areas that look darker in the finished piece. These under layers are essential if you wish to create a bird painting that looks right. You want it to have depth rather than appearing as a cartoon like flat image.
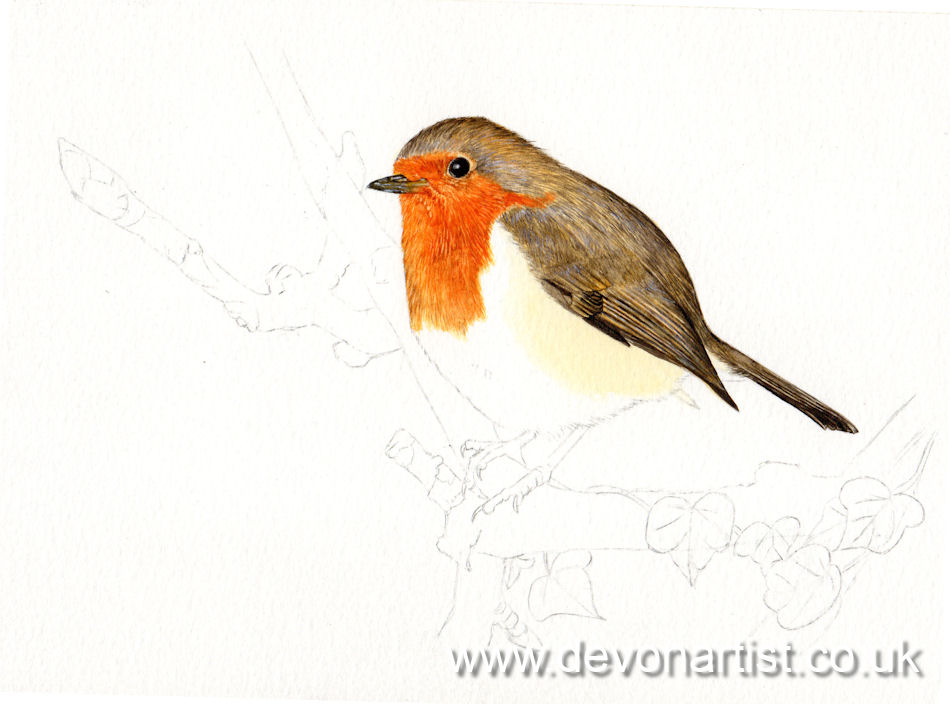
Working on the Chest
The bright orange chest feathers are the really characteristic part of any robin. The shade of orange will vary depending on the light that your photo was taken in. I always have little bits of scrap watercolour paper nearby, and I frequently test my mixes. This way I can ensure that they are a good match to the photo I am working from. If you would like a bit more information on this, I have a video on my YouTube channel that you might find interesting.
One of the advantages of working with darkening layers is that there’s room for alterations as you go along. Should your robin sport a very vivid chest, and you are working on a good quality paper, you should be able to lift off some paint. This will tone the layer down. Then simply ensure that your subsequent layers are toned back to a better colour before you apply them.
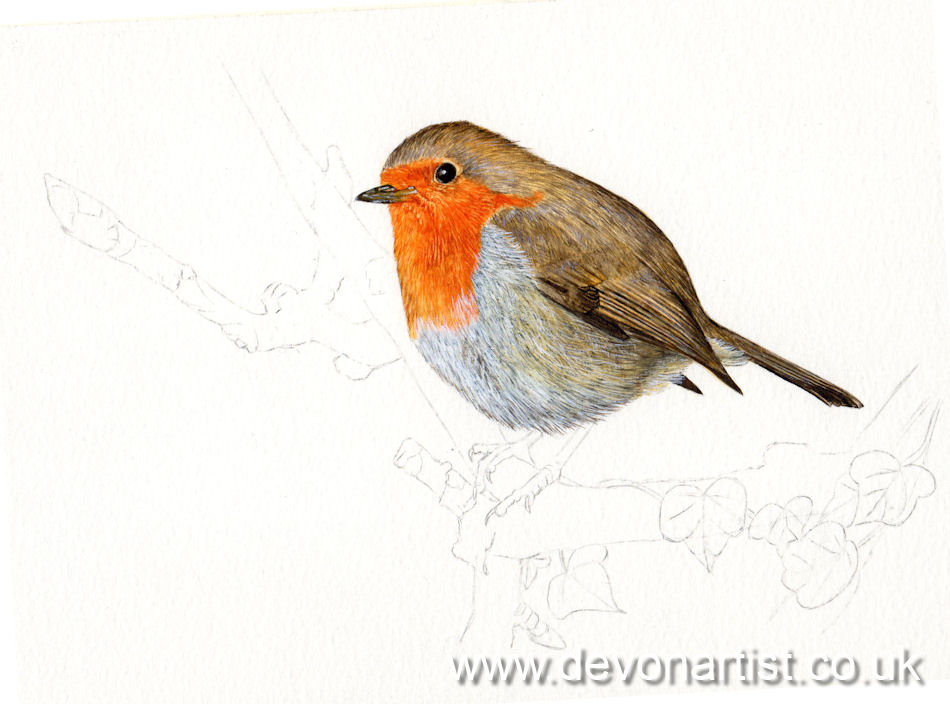
Work Systematically
You will see now how I paint a robin in detailed watercolour by working around the bird in a systematic and methodical way. This is certainly not the only way of painting. But it works for me, and it ensures that sections are fully dry and do not bleed into one another. This would of course be fine if I was working on a loose, suggestive style of painting. For a detailed, realistic piece of art, it just wouldn’t work.
Having completed the back and chest, the next logical place to go is the tummy. I’m left-handed, so this way of working down and across ensures I’m not constantly resting my hand on areas I’ve already worked on. It also means I can look at what I’ve already done without fear of dropping paint on it.
Protect your Work
Incidentally, a good way of protecting your finished sections is to have a piece of clean scrap paper underneath your painting hand. This will ensure you don’t transfer any natural oils from your hand onto the paper. These can act as a resist to any paint you subsequently apply to the surface.
Now, back to the painting…..the tummy area has a dark under-colour, this is laid down first. As this is one of my older pieces, I applied the white using acrylic. Now days I would use opaque watercolour white just to keep the piece more consistent. Acrylic is an easier white medium to work with, so a great substitute for beginners. It could also help anyone who lacks confidence with watercolour white to access paintings like this and build on their skill levels.
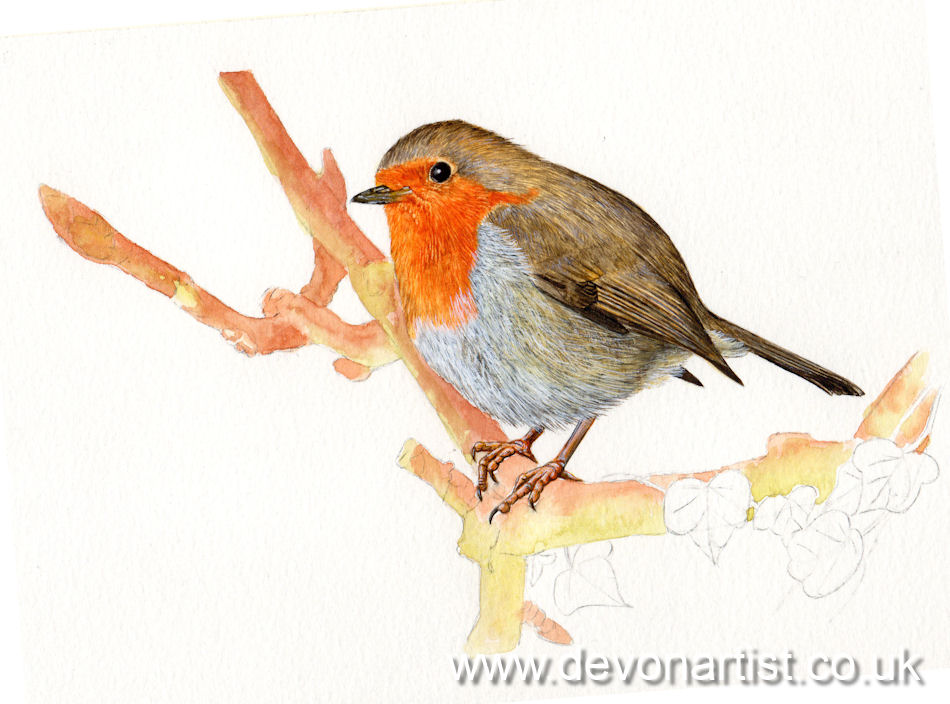
Legs, Feet & Twigs
The little legs and feet were created similarly, with very carefully placed background washes. These are applied with a small brush to ensure the fine lines and features are retained. The shape and form of the legs and feet are then created with darker tones. I have lightly blended these to give a rounded, realistic feel.
Finally, I turn my attention to the twig, applying some appropriate base tones. Unlike the bird, there is no need to be quite so tight and specific. Of course twigs, branches and trees all vary, they are all different. Therefore, anything goes, and you can relax a little and not obsess over detail quite so much in this section. Likewise for the ivy leaves which I added in. I looked at a few photos of ivy leaves and just went with the flow, simply adding veins here and there. Finally, adding some variation in colour to suggest the light hitting the tree from a certain direction casting shadow on one side.
Leisure Painter Magazine
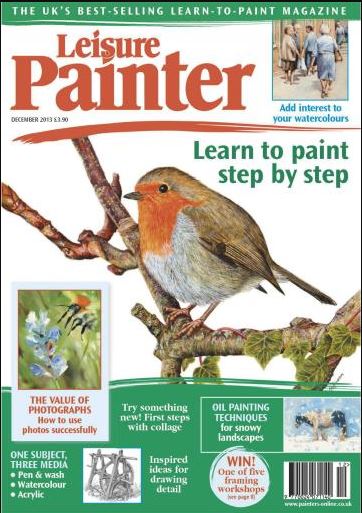
There you go, a little insight into this painting, which hopefully you have enjoyed. I couldn’t finish these ramblings without adding that back in 2013 I was absolutely thrilled when the full tutorial appeared in Leisure Painter magazine. Not only that, but the finished painting was on the front cover!
This blog is obviously just a quick overview of the whole process. I hope it has given you a good insight into how to paint a robin in detailed watercolour. Should you be interested in having a go at this project, I have it available in my online shop as a PDF downloadable lesson.
Until the next time, keep them brushes wet. Paul


2 Responses
You are King of Robins, Paul! They’re all so incredibly beautiful.. I tried to put em on my Pinterest page… but without success… then all of a sudden realized you once sent me the pdf :)))) :))) gettting so.. so old! Graziias.. mucho!!
Hi Erna, thank you very much! I do like painting Robins, I have painted many of them over the years and never get tired of it. Paul 🙂