Watercolour Osprey – the Painting Process
I recently came across a series of photos I had taken during the process of painting this osprey in watercolour. I thought it may be of interest so have made it the subject of today’s blog post.
The Osprey is actually a pretty rare bird in the UK, but across the world it is one of the most widely distributed birds of prey. Indeed, with a wing span of between 145 – 180 cm it is a large hawk but has a slender body and long legs. A fish eating bird they are usually found near water, and they have a reversible hind toe. Indeed, this probably helps in catching and holding on to their prey, although the exact method of catching apparently depends on the type of fish.
Within the UK there are many cameras now sited on Osprey nests and some birds can be easily identified by their leg rings. Some are even fitted with tracking devices which enable their long migration to Africa to be studied. This has definitely opened up a whole new world for people who like to observe wildlife in intimate detail from the comfort of their own home.
The Painting
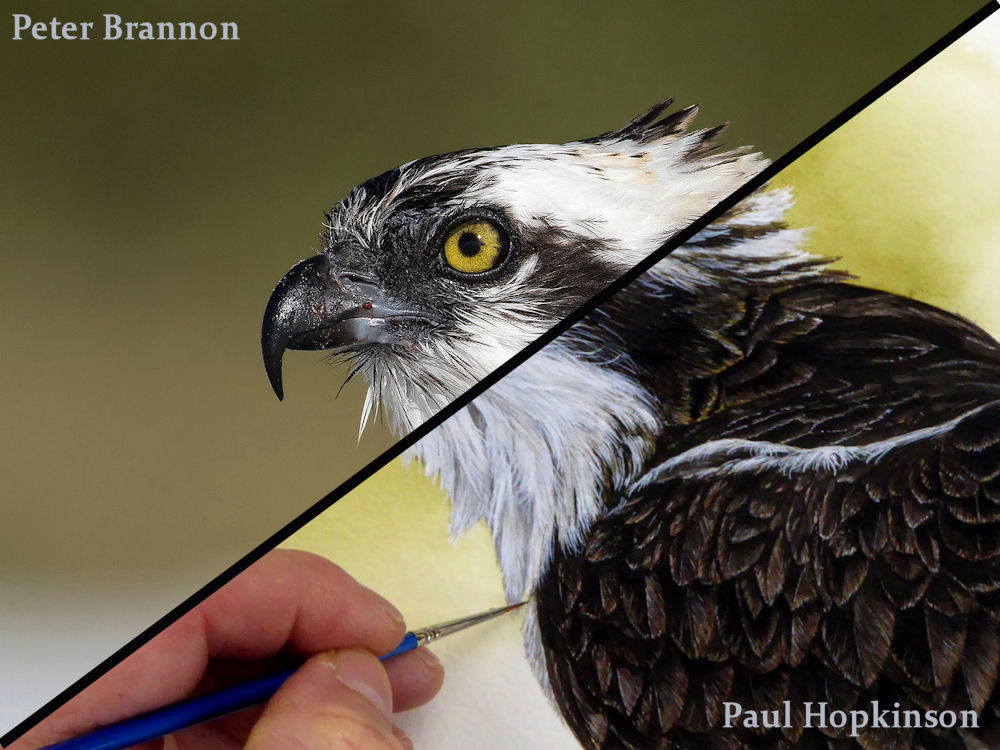
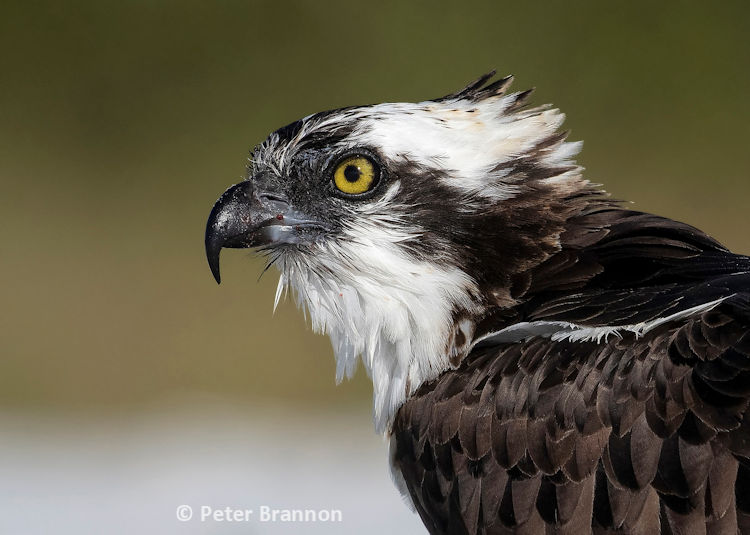
I began the watercolour painting process for the osprey with an excellent reference photo by Peter Brannon from Flickr. Peter has kindly allowed me to use a number of his photos as a basis for my watercolours and for this I am incredibly grateful. Whilst I would dearly love to take my own photos there just isn’t the time in the day. 😉
The Eyes
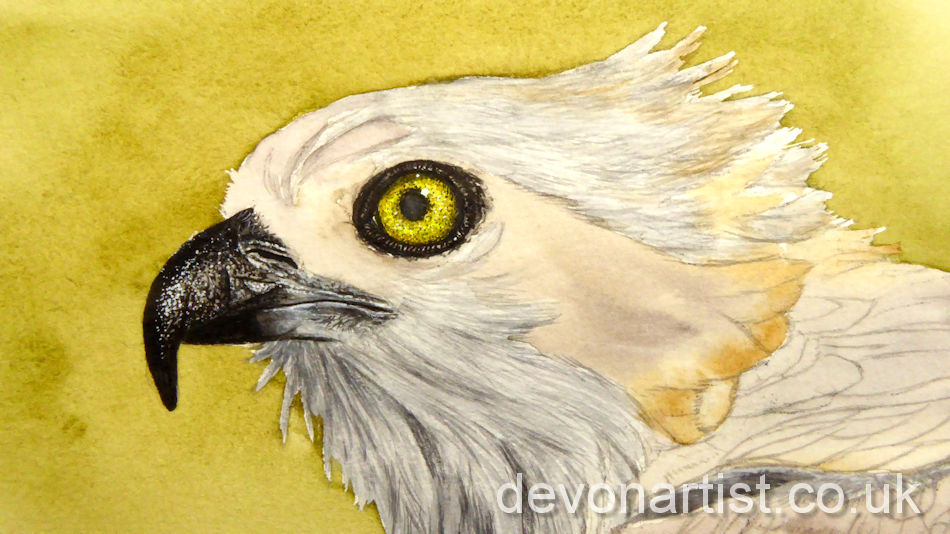
For anyone who follows me you will know that the first part of my paintings is almost always the eyes. For the Osprey, once the background was dry I started work on the eye. Having already decided that the background would complement the bird I used the same colours to build up the depth of detail within the eye. I started off with very pale washes and at this stage began to develop the rounded feel to the eye. Darkening the washes towards the edge and lightening them as they came towards the pupil.
Having allowed each layer to dry thoroughly I then began to apply the fine detail within the iris. This again was built in layers using the fine tip of a size 00 brush to gently increase the colours. I rarely paint just the eye and prefer to add the detail within the eyelids too. I find this gives the eye something to sit within and would make a painting in its own right. It definitely gives me something to look at as I work – particularly with the added watercolour white highlight. This gives that all important spark of life.
The Beak
The Feathers
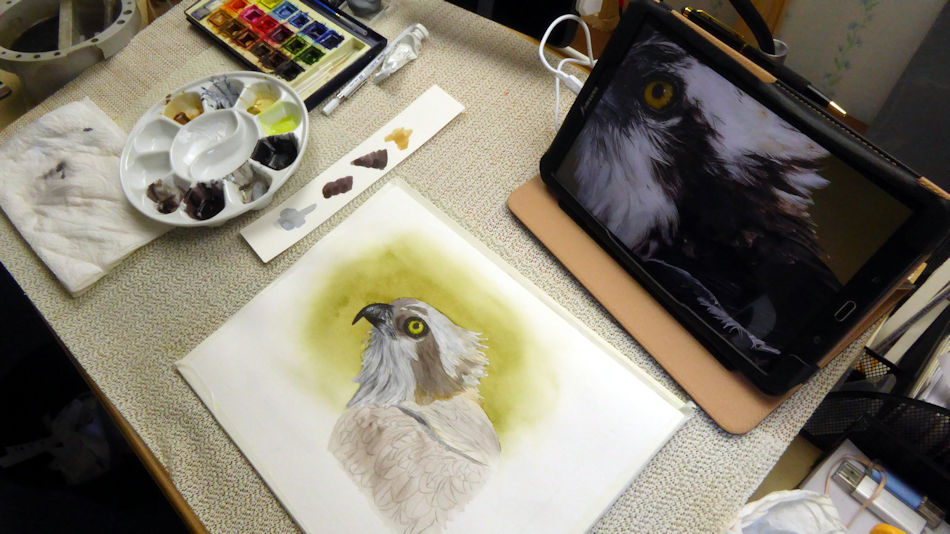
With the main features now in place I start to work my way systematically around the plumage of the bird. Starting from the face and gradually working my way down. This method ensures that your hand isn’t constantly across areas that you have already completed. I tend to work from a tablet and this enables me to really zoom into the fine detail within a painting. At the same time I get through masses of scraps of watercolour paper. I like to test colours and compare them to the photo before committing them to the painting. As with the eye and beak the building up of the feathers is a gradual process. I begin by identifying a good colour to form the foundation wash. I will vary the depth and tone of this colour to start building the three-dimensional feel to the bird.
You will notice how I have used the soft brown colour to act as a base for the really dark head plumage. Indeed, if you look closely you will still see this foundation colour showing through in places. Likewise, for the white head feathers the underlying colours were based on a grey palette. This is perhaps easier to pick out within the white feathers.

The Body Plumage
In comparison to the feathers on the head, the ones making up the back and wing are much more defined. As such, after the initial base washes I worked on each individually. To achieve a realistic feel the individual feathers needed to be identifiable as such. When I work on feathers like this it is really important to consider how a feather is actually formed. You will notice that I have worked in a fan shape from the central shaft of each feather. At the same time I have used different tones to give the feeling of the feathers being laid one on top of the other. If you are interested in how to paint feathers like this, check out my video on YouTube. This goes through the process in more depth than I can here.
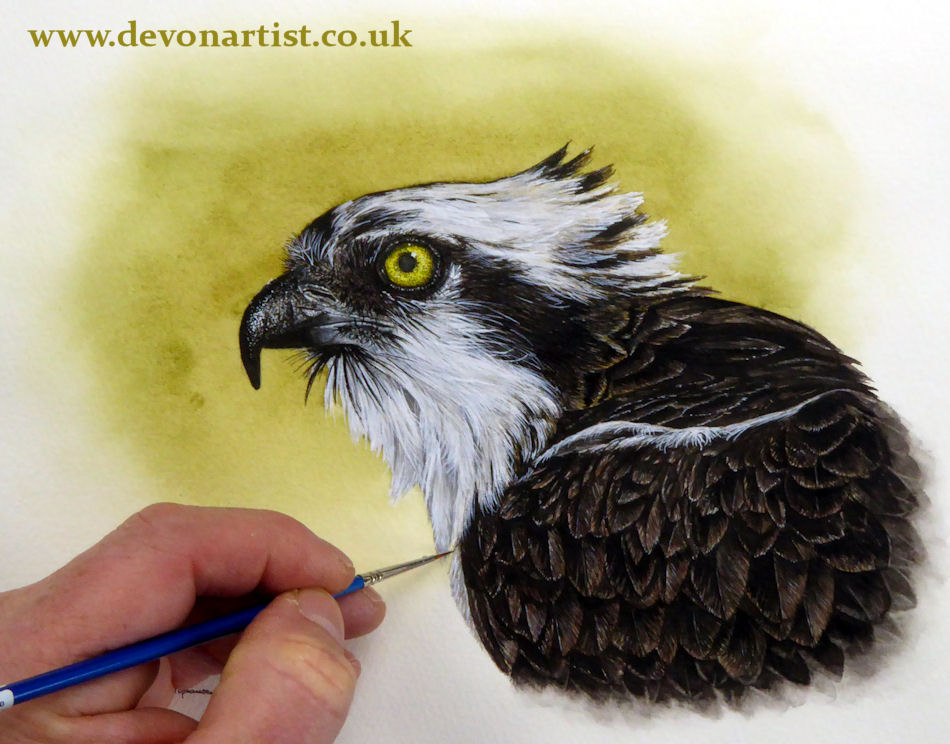
Through a combination of paint layers, lifting off and fine detail the body of the Osprey gradually comes to life. I have chosen to fade out the detail to the right-hand side, but you could continue to paint the feathers. You can at least see the under layers within these feathers, giving an indication of what lies beneath the finished painting.
I did actually record the finish of this painting which may also be of interest to you. I hope you have enjoyed sharing in the journey of this particular Osprey from photo to painting and that it has inspired you to have a go yourself.
Until the next time – keep them brushes wet. Paul 🙂