How I Painted a Pair of Pied Flycatchers
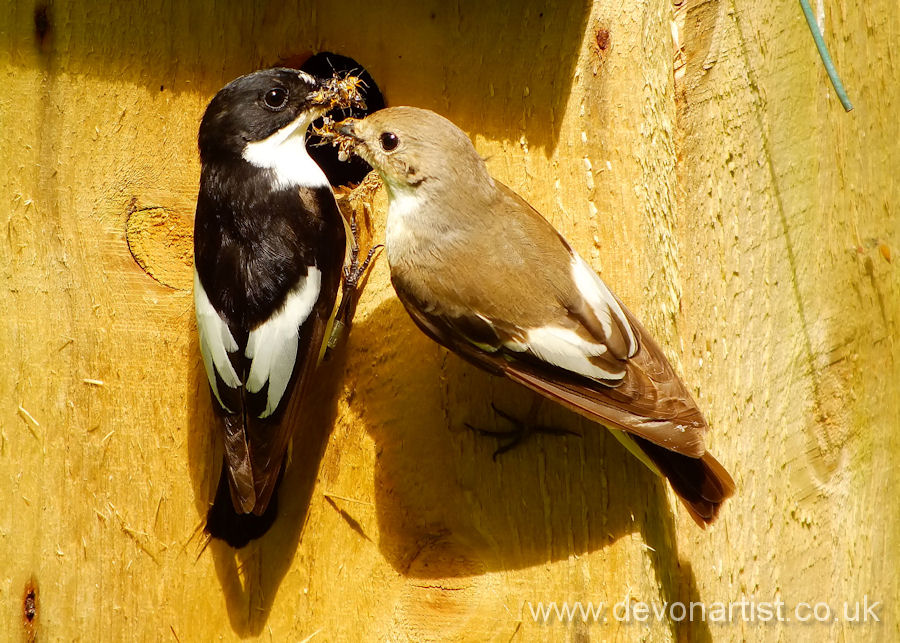
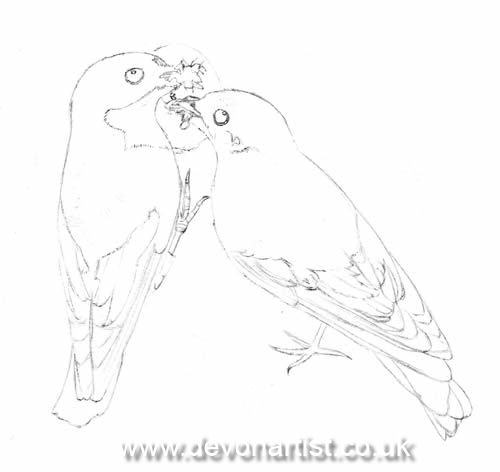
So, to carry on from where we left off last week and now to how I painted a pair of Pied Flycatchers. We are at the point where I had my reference material decided upon. So I was just about to put brush or was that pencil to paper? Indeed, pencil was actually the first place that I started. Bear in mind that this painting was completed several years ago. I was printing my images in draft format and covering the back of the paper in graphite. I would then trace the main outlines of the image with enough pressure to transfer the graphite to my watercolour paper. I’ve since discovered actual graphite paper, and what a day that was!
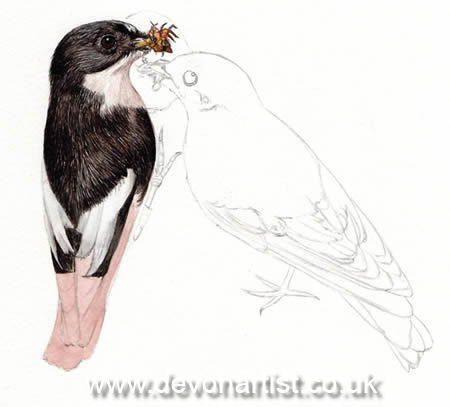
Starting with the eye
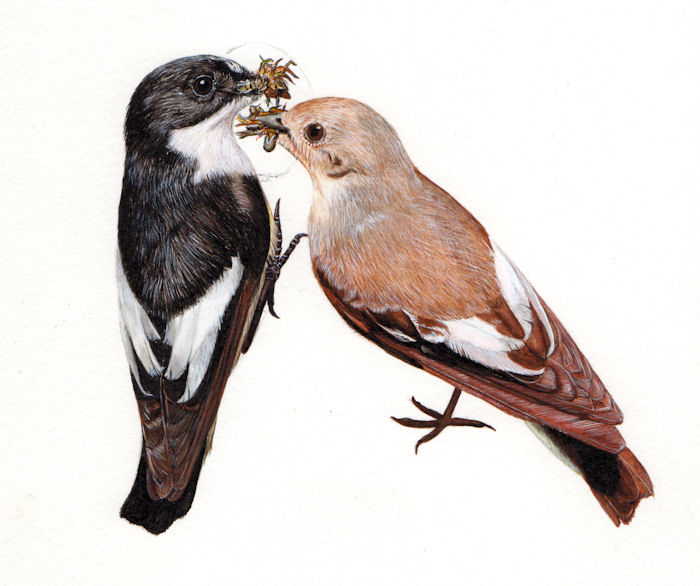
For anyone who regularly follows my work, you will know that I work my way around a painting. I almost always start with the eye, and I like to finish off sections before moving on to other areas. You can see in the image below, that I have applied a pink toned background wash and have used this to build the black detail on top. The pink gives a warm feeling to the feathers, it takes away the starkness of a flat black. I would have also mixed a similar colour in with the black paint to warm it too.
My paintings are built with a layering technique. In other words, the feather details are created in 3-4 layers of fine lines. I am constantly working over and over the same areas to give the depth of colour and detail needed. I am effectively working with coloured water. Therefore, applying the same colour layer upon layer will gradually deepen and intensify the colour. I continue with this process until I get the result I want.
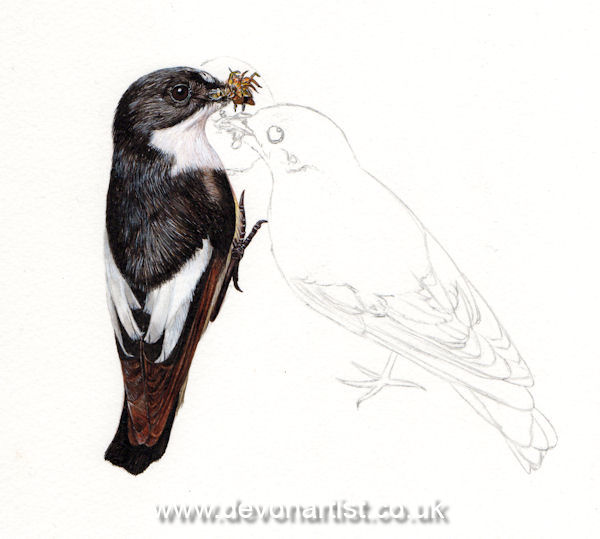
How to create realism
With any bird painting, it is important to take note of the different type of feathers. For instance, those on the head are very different to those on the wings and tail. Whilst the colours may be the same, the brush strokes needed to make the feathers look real are often very different. The line lengths and directions can vary considerably. Therefore, it is really essential to note this before getting carried away. It is all too easy to think that it is simply a case of filling in an area with one colour in one direction. I frequently make a few reference marks within an area. This in turn indicates and reminds me of the line type and direction to work in. This can save a lot of time and frustration later.
I was lucky with my photo and had both birds in the photo together and in the position that I wanted them. Putting two images together and getting the birds in a natural looking pose would be a lot more difficult. I am glad that I didn’t have to do that.
Male and Female
Like many birds, the male and female are significantly different in their colouration. The male obviously giving rise to the ‘pied’ part of their name and the female a different colour altogether. Both have large eyes in comparison to their bodies, and in bird books they are often loosely associated with robins. Indeed, a bird which also has quite large eyes compared to its size. How I painted this pair of Pied Flycatchers was made easier as the feather formation was the same for both birds. This is not always the case. I was able to use similar brush strokes on the female, building the colours from a brown spectrum instead.
Bark instead of a box
If you read my last blog, you will know that a natural setting was needed for this painting. So rather than having the birds on a box, we wanted them on the side of a tree. Giving the illusion of them going into a natural hole in the bark instead…..artistic licence and all that! I wanted to paint a detailed background, so felt that I required an image to work from. This section of a nearby tree seemed like it would work perfectly. Especially with a sort of natural hole in the centre.
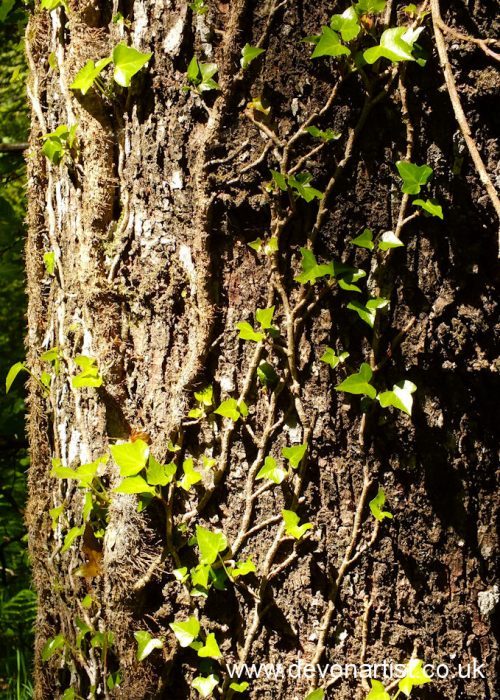
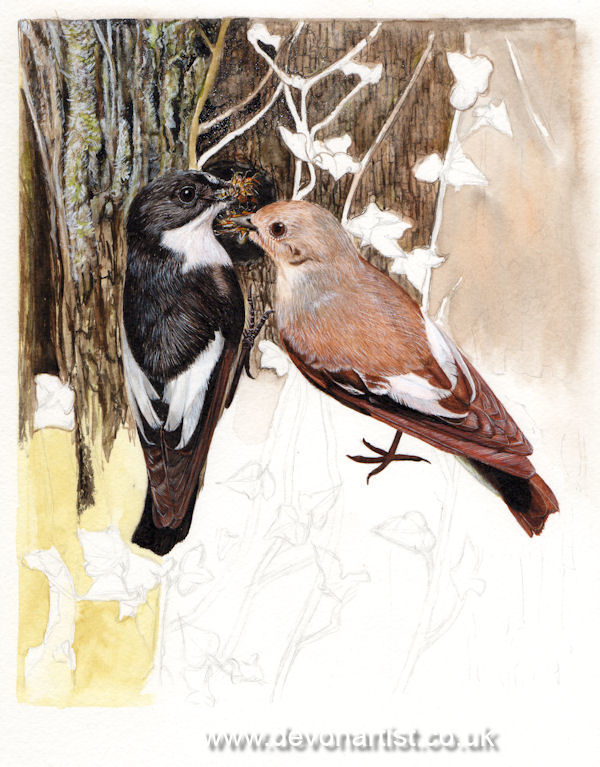
Take a look at the two photos and see if you can work out which section of the bark and ivy I used. Having already painted both birds, I had to carefully cut in around them with my washes and detail work. I decided to approach this in sections, applying the background wash and a rough suggestion of bark. Then building layer on layer and colour on colour to finally finish with a good representation of the photo. The bark was of course finished off by my well known white highlights. I suspect back then these were in watered down white acrylic. As you know, I now use an opaque watercolour white instead.
Photographs
There you have it, a very brief overview of how I created this painting all the way through from start to finish. I absolutely love painting from my own reference photos. Unfortunately, I rarely get the opportunity these days to devote the time to capturing those all important ‘just right’ photos. Fortunately, I have some very good photographers who put in those hours and are happy for me to use their photos in my work. Without them, I could not do what I do, so a very BIG Thank You to each one of them. I really do appreciate your generosity and kindness.
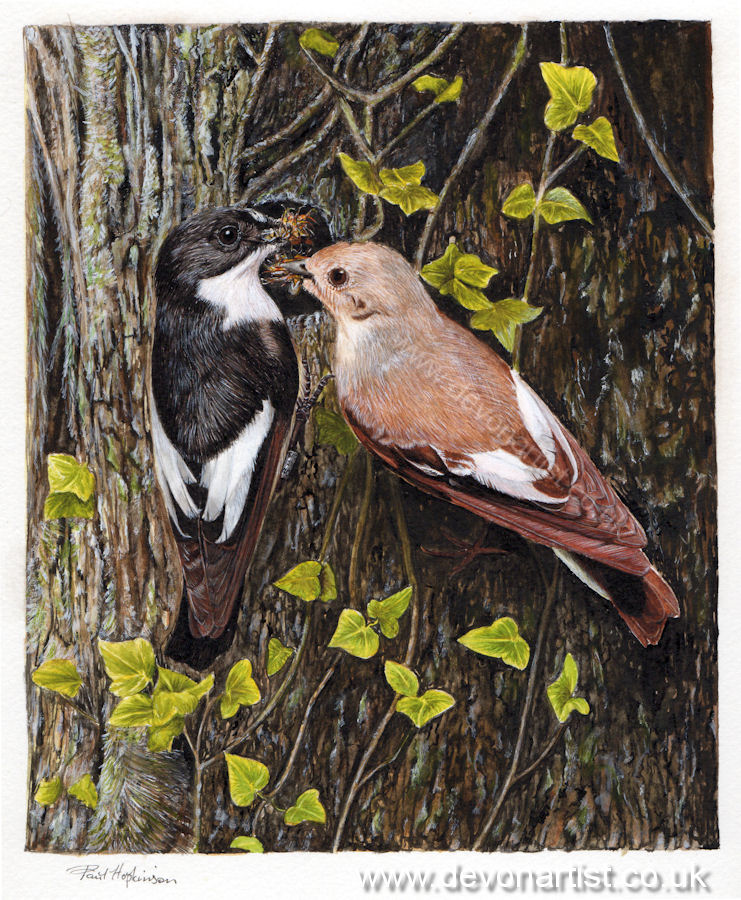
I hope you enjoyed that little insight into the whole process of how I painted a pair of Pied Flycatchers. For more information on this delightful migrant species, do check out the RSPB website.
Until the next time……keep them brushes wet! Paul



4 responses
That was really interesting…thank you, Paul!
You are welcome, thank you for reading my blog. Paul 🙂
As you know Paul, I really love this picture. Thank you for letting us see your thoughts throughout this painting 🙂
You are very kind Maria, you know the process I go through with each painting. 🙂